Jython|Writing Servlets in Jython
Jython Webapp Tutorial - Part 1 - Writing Servlets in Jython
Jython Webapp Tutorial - Part 1 - Writing Servlets in Jython
Sean McGrath
http://www.propylon.com
http://seanmcgrath.blogspot.com
10 October 2004
Here is what we are going to cover in this section of the tutorial:
- Installing Jython
- Installing Apache Tomcat
- Configuring Tomcat to run Jython Servlets
- Running Jython Servlets from the command line
- Accessing the Jython library
Pre-requisites
You must have a Java Development Kit installed on your machine. I used JDK 1.4.1_05 which is installed in d:\j2sdk1.4.1_05 on my machine. Make sure you can compile java programs sucessfully on your platform. When working with dynamic languages such as jython on the JVM, it is important to be able to distinguish between problems at the basic Java level and problems at the dynamic language level.Installing Jython
Download Jython from www.jython.org/download.html
Jython is shipped as a single class file which you run in order to install it on your system.
The installation instructions are straighforward: www.jython.org/install.html
As always, there are platform-specific nuances. Check out your platform on /www.jython.org/platform.html.
My setup is that I have Jython installed in d:\jython-2.1. I have added that directory onto my Windows path so that I can invoke Jython from the command line from any directory.
When you first fire up Jython from a command window it will search through your classpath and create a cache of all the stuff it finds there.
You should see something like this: (click for large version)
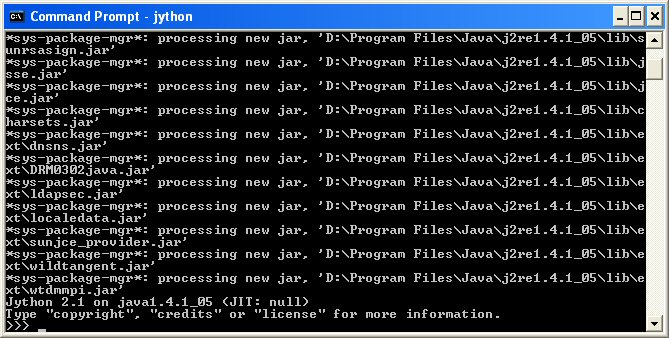
You will find yourself at the Jython command prompt: Jython 2.1 on java1.4.1_05 (JIT: null) Type "copyright", "credits" or "license" for more information. >>>>
Welcome to interactive Java :-)
Note to emacs users. Jython works just fine from the emacs shell. Unlike CPython, it does not require the "-i" switch in order to recognize an interactive session. No, I don't know why that is.
Now we can do something predictable and boring: >>>print 1+2 3
You are stunned into silence, I know.
To get out of Jython's interactive shell you can press ^c twice or press ^d once. I prefer the former because the latter causes Emacs to close its interactive shell window. ^z doesn't work for me on Windows. No, I don't know why that is.
Pedants, purists and epicures may prefer: >>> raise SystemExit
Which closes Jython gracefully.
Now for something more interesting. Fire up Jython again and try this: >>>import java.lang.String
Nothing happens. That's good. You have now succesfully loaded the Java String class into Jython. Because we have an interactive shell, we can poke around to find stuff. Try this:
>>>dir (java.lang.String)This time you will get output. Something like this:
['CASE_INSENSITIVE_ORDER', 'bytes', 'compareTo', 'compareToIgnoreCase', 'concat',<br> 'contentEquals', 'copyValueOf', 'endsWith', 'equalsIgnoreCase', 'getBytes', 'getChars',<br> 'indexOf', 'intern', 'lastIndexOf', 'matches', 'regionMatches', 'replace', 'replaceAll',<br> 'replaceFirst', 'split', 'startsWith', 'substring', 'toCharArray', 'toLowerCase',<br> 'toUpperCase', 'trim', 'valueOf']This is a list of all the attributes of the java.lang.String class that Jython can see. Now lets make use of that information:
First, create a java.lang.String object called S. Initialize it to the obligatory "Hello world":
>>> S = java.lang.String("Hello world")Now convert the string to lowercase using the toLowerCase method:
>>> S.toLowerCase() 'hello world'Cute eh? This is the sort of seamless integration with Java classes that brings so much power to Jython and greases the wheels of application development and debugging something wonderfull.
So now that Jython is up and running, we turn our attention to Tomcat.
Installing Tomcat
You can download Tomcat from jakarta.apache.org/tomcat/
The version I used is Tomcat 5-0-28. I have installed mine in d:/data/tomcat-5-0-28.
You need to set the CATALINA_HOME environment variable to point to the root of your Tomcat install. You also need the JAVA_HOME environment variable pointing at your Java install but you probably already have that.
Start up Tomcat by executing the startup command in the bin subdirectory of your Tomcat install. You should see something like this:

Tomcat fires up a second window where all subsequent action takes place. It should look something like this:

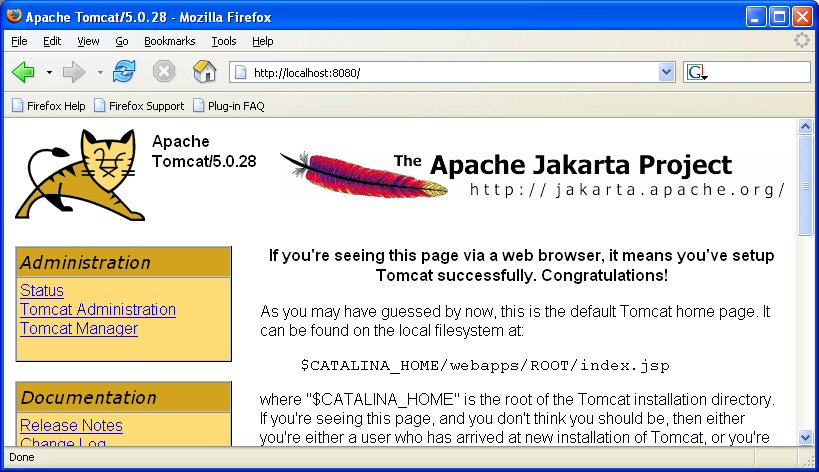
Now to point a web browser at it. By default, Tomcat fires up on port 8080. Point at browser at localhost:8080 and you should see this:
So far, so far. Now lets proceed to create a Java servlet the classical (baroque?) way in order to make sure that all our Java kit is functioning as required.
Configuring Tomcat to run Jython Servlets
You can put this on your CLASSPATH or you can specify it on the command line to javac like this:
javac -classpath %CLASSPATH%;%CATALINA_HOME%\common\lib\servlet-api.jarCreate a subdirectory in %CATALINA_HOME\webapps called jythondemo.
Create a WEB-INF subdirectory and then create a classes subdirectory of WEB-INF.
In the classes directory, create a Java file called ServletTest.java with this code:
import java.io.*; import javax.servlet.*; import javax.servlet.http.*; public class ServletTest extends HttpServlet { public void doGet (HttpServletRequest request, HttpServletResponse response) throws ServletException, IOException { doPost(request, response); } public void doPost (HttpServletRequest request, HttpServletResponse response) throws ServletException, IOException { response.setContentType ("text/html"); PrintWriter toClient = response.getWriter(); toClient.println ("<html><head><title>Servlet Test</title>" + "<body><h1>Servlet Test</h1></body></html>"); } }This thorougly unexciting Servlet simply creates a HTML test page to be sent back to the browser.
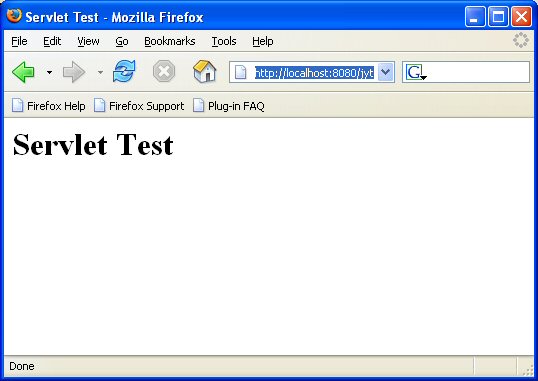
<web-app> <servlet> <servlet-name>ServletTest</servlet-name> <servlet-class>ServletTest</servlet-class> </servlet> <servlet-mapping> <servlet-name>ServletTest</servlet-name> <url-pattern>/ServletTest</url-pattern> </servlet-mapping> </web-app>When you bring Tomcat back up again, the following URL should work : localhost:8080/jythondemo/ServletTest.
All going well, you will see this:
Now we can proceed to create the Jython version of this servlet. Jython servlets work by means of an intermediate Java servlet know as PyServlet. Simply put, this is the servlet that Tomcat runs and it, in turn, invokes Jython programs. Got it? So, the first thing we need to do is tee up PyServlet.
PyServlet lives in jython.jar. The preferred way to make jython.jar available to you webapps it to put it in a WEB-INF/lib subdirectory of your context - in this case in a lib sub directory of the jythondemo directory : jythondemo/WEB-INF/lib.
Now we tell Tomcat about PyServlet and tell it that PyServlet is to be invoked whenever a request for a resource matching *.py is made. To do that, we make the following additions to the web.xml file:
<servlet> <servlet-name>PyServlet</servlet-name> <servlet-class>org.python.util.PyServlet</servlet-class> <load-on-startup>1</load-on-startup> </servlet> <servlet-mapping> <servlet-name>PyServlet</servlet-name> <url-pattern>*.py</url-pattern> </servlet-mapping>The full web.xml now looks like this:
<web-app> <servlet> <servlet-name>ServletTest</servlet-name> <servlet-class>ServletTest</servlet-class> </servlet> <servlet> <servlet-name>PyServlet</servlet-name> <servlet-class>org.python.util.PyServlet</servlet-class> <load-on-startup>1</load-on-startup> </servlet> <servlet-mapping> <servlet-name>ServletTest</servlet-name> <url-pattern>/ServletTest</url-pattern> </servlet-mapping> <servlet-mapping> <servlet-name>PyServlet</servlet-name> <url-pattern>*.py</url-pattern> </servlet-mapping> </web-app>Now it is time to create a Jython equivalent of the Java Servlet above. Here it is (JythonServlet1.py): from javax.servlet.http import HttpServlet class JythonServlet1 (HttpServlet): def doGet(self,request,response): self.doPost (request,response) def doPost(self,request,response): toClient = response.getWriter() response.setContentType ("text/html") toClient.println ("<html><head><title>Servlet Test</title>" + "<body><h1>Servlet Test</h1></body></html>")
Is that it? I hear you say? Yes. Put it into the jythondemo subdirectory.
Restart your Tomcat one more time just as before. Now this URI should work: localhost:8080/jythondemo/JythonServlet1.py
Same output as before right? Now comes the fun part. Change the servlet in some trivial way. e.g. change the text in the HTML page it produces. What do you need to do to re-deploy the changed Jython servlet. These three things:
- zilch
- nada
- nothing
What do you need to do in order to deploy a second Jython servlet, called, says JythonServlet2.py? Apart from creating the file and putting it into the jythondemo directory, you have to do these three things:
- zilch
- nada
- nothing
Welcome to Java rapid development :-)
You might want to take a moment or two to contemplate the significance of the simplcity of all this. Think how easy you can make it to change stuff in installations of your software by making some/all of the servlets .py files. "Configuration files" takes on a whole new meaning doesn't it?
Running Jython Servlets from the command line
import sys from java.io import * from javax.servlet.http import HttpServlet from JythonServletUtils import * class JythonServlet2 (HttpServlet): def doGet(self,request,response): self.doPost (request,response) def doPost(self,request,response): toClient = response.getWriter() response.setContentType ("text/html") toClient.println ("<html><head><title>Servlet Test 2</title>" + "<body><h1>Servlet Test 2</h1></body></html>") if __name__ == "__main__": JS2 = JythonServlet2() dummyRequest = DummyHttpRequest() dummyResponse = DummyHttpResponse() JS2.doPost (dummyRequest,dummyResponse) JS2 = JythonServlet2() dummyRequest = DummyHttpRequest() dummyResponse = DummyHttpResponse() JS2.doPost (dummyRequest,dummyResponse)- The first line creates an instance of the Servlet
- The second line creates a dummy HttpRequest object (more on this is a tick.)
- The third line creates a dummy HttpResponse object (more on this is a tick.)
- The last line invokes the doPost method of the servlet, passing in the dummy objects.
In English this is what is going on:
When executed this servlet produces the following output: D>jython JythonServlet2.py Content-Type:text/html <html><head><title>Servlet Test 2</title><body><h1>Servlet Test 2</h1></body></html> from java.lang import System class DummyHttpRequest: pass class DummyHttpResponse: def setContentType(self,t): System.out.println ("Content-Type:%s" % t) def getWriter (self): return System.outAccessing the Jython library
Jython 2.1 on java1.4.1_05 (JIT: null) Type "copyright", "credits" or "license" for more information. >>>I know the module is called calendar. Lets take a look...
>>> import calendar >>> dir(calendar) ['EPOCH', 'FRIDAY', 'February', 'January', 'MONDAY', 'SATURDAY', 'SUNDAY', 'THURSDAY', 'TUESDAY', 'WEDNESDAY', '__all__', '__doc__', '__file__', '__name__', '_center', '_colwidth', '_firstweekday', '_spacing', 'calendar', 'day_abbr', 'day_name', 'error', 'firstweekday', 'format3c', 'format3cstring', 'isleap', 'leapdays', 'localtime', 'mdays', 'mktime', 'month', 'month_abbr', 'month_name', 'monthcalendar', 'monthrange', 'prcal', 'prmonth', 'prweek', 'setfirstweekday', 'timegm', 'week', 'weekday', 'weekheader']The calendar thing looks promising. I wonder what it is?
>>> type (calendar.calendar) <jclass org.python.core.PyFunction at 15530730>Hmmm. Its a function. Sounds promising. Any docstrings I wonder?
>>> calendar.calendar.__doc__ "Returns a year's calendar as a multi-line string."Sounds good. Lets have one of them...
>>> c = calendar.calendar() Traceback (innermost last): File "<console>", line 1, in ? TypeError: calendar() takes at least 1 argument (0 given)Oops! It needs at least one argument. What are the chances that the first parameter is a year?
>>> c = calendar.calendar(2004)So far, so good. What type is c?
>>>type(c) <jclass org.python.core.PyString at 25002217>Houston? We have a string! Lets take a look...
>>> c ' 2004 Jauary February March Mo Tu We Th Fr Sa Su Mo Tu We Th Fr Sa Su Mo Tu We Th Fr Sa Su 1 2 3 4 1 1 2 3 4 5 6 7 5 6 7 8 9 10 11 2 3 4 5 6 7 8 8 9 10 11 12 13 14 12 13 14 15 16 17 18 9 10 11 12 13 14 15 15 16 17 18 19 20 21 19 20 21 22 23 24 25 16 17 18 19 20 21 22 22 23 24 25 26 27 28 26 27 28 29 30 31 23 24 25 26 27 28 29 29 30 31 April May June Mo Tu We Th Fr Sa Su Mo Tu We Th Fr Sa Su Mo Tu We Th Fr Sa Su 1 2 3 4 1 2 1 2 3 4 5 6 5 6 7 8 9 10 11 3 4 5 6 7 8 9 7 8 9 10 11 12 13 12 13 14 15 16 17 18 10 11 12 13 14 15 16 14 15 16 17 18 19 20 19 20 21 22 23 24 25 17 18 19 20 21 22 23 21 22 23 24 25 26 27 26 27 28 29 30 24 25 26 27 28 29 30 28 29 30 31 July August September Mo Tu We Th Fr Sa Su Mo Tu We Th Fr Sa Su Mo Tu We Th Fr Sa Su 1 2 3 4 1 1 2 3 4 5 5 6 7 8 9 10 11 2 3 4 5 6 7 8 6 7 8 9 10 11 12 12 13 14 15 16 17 18 9 10 11 12 13 14 15 13 14 15 16 17 18 19 19 20 21 22 23 24 25 16 17 18 19 20 21 22 20 21 22 23 24 25 26 26 27 28 29 30 31 23 24 25 26 27 28 29 27 28 29 30 30 31 October November December Mo Tu We Th Fr Sa Su Mo Tu We Th Fr Sa Su Mo Tu We Th Fr Sa Su 1 2 3 1 2 3 4 5 6 7 1 2 3 4 5 4 5 6 7 8 9 10 8 9 10 11 12 13 14 6 7 8 9 10 11 12 11 12 13 14 15 16 17 15 16 17 18 19 20 21 13 14 15 16 17 18 19 18 19 20 21 22 23 24 22 23 24 25 26 27 28 20 21 22 23 24 25 26 25 26 27 28 29 30 31 29 30 27 28 29 30 31 'I normally just xcopy over the entire \jython2-1\lib directory and suggest you do the same.
You should at this stage have the following directory structure:
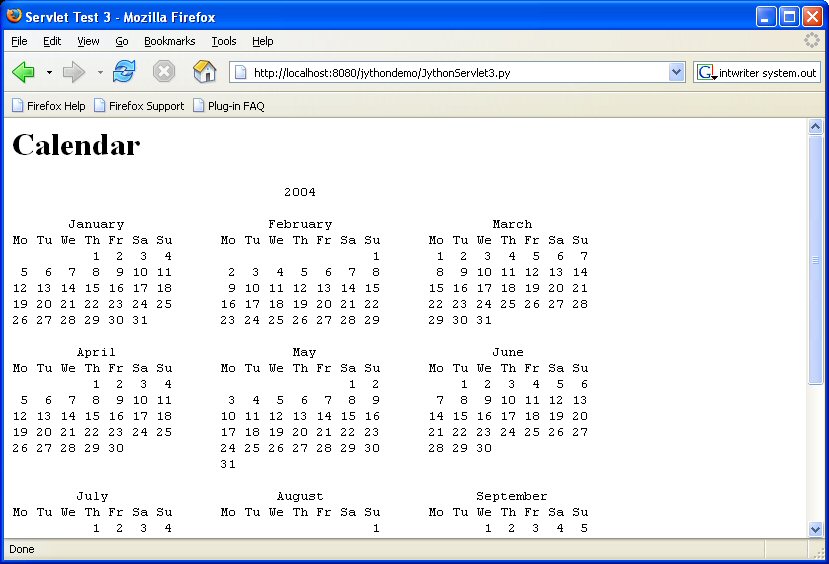
jythondemo WEB-INF classes lib cachedir packages Lib cachedir packages encodings jxxload_help pawt test xml dom ext reader html parsers xmlproc sax drivers2 utils import sys,calendar,time from java.io import * from javax.servlet.http import HttpServlet from JythonServletUtils import * class JythonServlet3 (HttpServlet): def doGet(self,request,response): self.doPost (request,response) def doPost(self,request,response): toClient = response.getWriter() response.setContentType ("text/html") toClient.println ("<html><head><title>Servlet Test 3</title>") toClient.println ("<body><h1>Calendar</h1><pre>%s</pre></body></html>" % calendar.calendar(time.localtime()[0])) if __name__ == "__main__": JS3 = JythonServlet3() dummyRequest = DummyHttpRequest() dummyResponse = DummyHttpResponse() JS3.doPost (dummyRequest,dummyResponse)Pointing a webbrowser at localhost:8080/JythonServlet3.py should product this output:
Summary and pointers to other stuff
In this section we have seen how to set up Jython to work within Tomcat. The same procedure - with a few tweaks - will make it work in any Servlet container. We have seen how easy it is to modify existing servlets and add new ones once Jython is properly set up. We have seen how to set up servlets so that they can easily be tested outside of a servlet container environment. Finally, we have seen a few examples of how poking around with Jython's interactive mode really speeds up finding stuff and finding out how it works.
A full treatment of Jython Servlets would take a whole book. Some of the fun stuff that we have not covered:
- You can compile jython to native java class files using the Jython compiler - jythonc.
- You can use Jython in JSP pages
- You can implement beans (of all forms) in Jython. For example, you can create beans for use in JSP pages.
- You can implement tag libraries in Jython
In the next section of this tutorial, we will look at accessing the rich and varied and mission critical world of asynchronous messaging via the JMS API from Jython. Actually, we might do some XML work first. I haven't decided yet.

No comments:
Post a Comment